BUTA MESHI

p33

Food culture is very interesting.  When I arrived here 15 years ago, I was so upset in a grocery store because I couldn’t find chicken thigh with skin without bone.  In Japan, chicken thigh without bone has  always skin.  If not, how could we make Japanese style fried chicken, Ka-ra-a-ge!!!  or OYAKO DON!!  ( I haven’t introduce this easy and delicious rice bowl yet!  I have to do that sometime soon!)

It has been 15 years. Still I can’t find chicken thigh without bone with skin, but I knew now that’s the way here, so I can accept that.   I get accustomed to making ka-ra-a-ge with chicken thigh without skin.  A little compromise.


20150321090658a3d

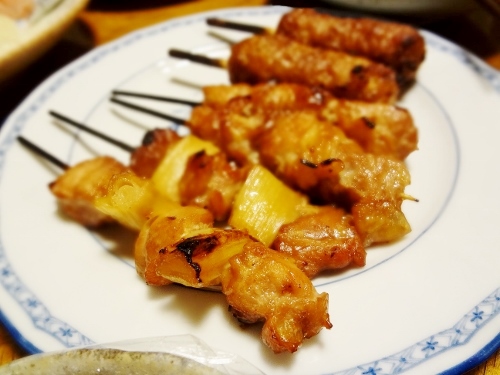
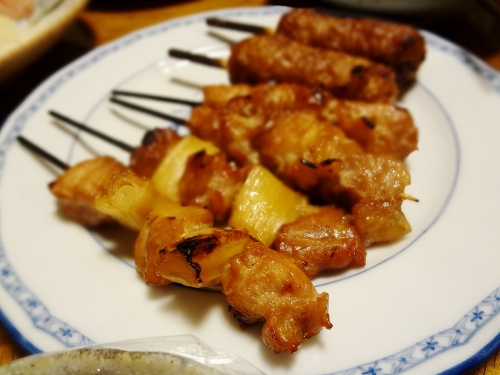
I don’t know why, but we Japanese love skin.  If you have a chance to go to Japan, please try chicken skin Yakitori (chicken skewers).  That is my favorite Yakitori.  I love fish skin as well, especially salmon skin.  Every time I give dried cod or salmon skin to my furry kids, I envy them.

Another thing I didn’t know the reason was about pork bellies.  Why don’t they have thick pork belly in grocery stores?  Very recently I finally found them sold in Wholefoods.

Japanese like FAT (you know the famous KOBE BEEF with marble of FAT!) , so we often use sliced pork belly (not bacon) in our dish.  They are tasty , easy to use, and cook fast!

I go to Asian grocery store a few times in a month.  The last time I went there, I purchased blocks of  pork bellies.  I didn’t have any specific menu I wanted to cook, but I thought I shouldn’t miss this good opportunity for me to get them.

p2

Now I have some blocks of pork bellies in my hand.

What should I cook?

When I was a kid, I didn’t like meat as much as others, but I loved my mom’s KAKUNI (slow cooked pork belly).  I know that is delicious, but I wanted to try something new.


p30

Today I will introduce BUTA (pork) MESHI (rice )!!

We ladies shouldn’t use this word, MESHI.  The word sounds very mannish, but that’s why when I use this word for this dish, that sounds DELICIOUS.

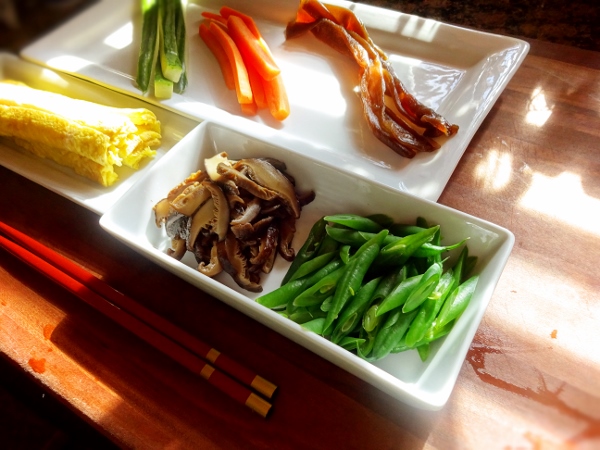
Here are today’s ingredients for BUTA MESHI.

  • 2 pork bellies ( about 1 pound each)
  • green part of Asian green onion (thick green onion)  (if you don’t have them, use regular green onion’s top parts)
  • 3 or 4 slices of ginger root
  • 1 tablespoon of white rice
  • 1 tablespoon of shiokoji (if you don’t have it, use just 1 teaspoon of salt. Detailed in ka ra a ge article here)
  • 5-6 tablespoons of brown sugar
  • 4 table spoons of soy sauce
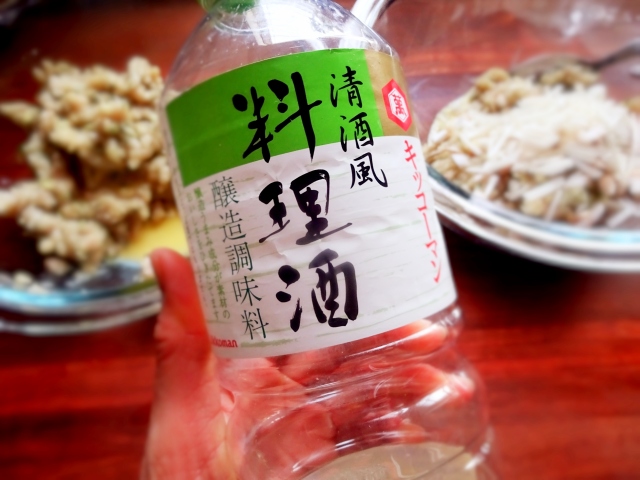
  • 5 table spoons of mirin
  • black pepper, cilantro (optional)

Then let’s cooking!

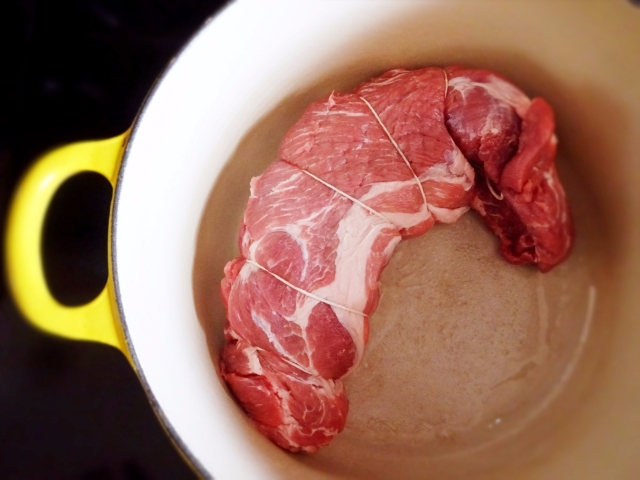
Rub pork bellies with shiokoji (or salt) and leave them about 10 minutes.

p5

Put the pork in the pot, and then,,,


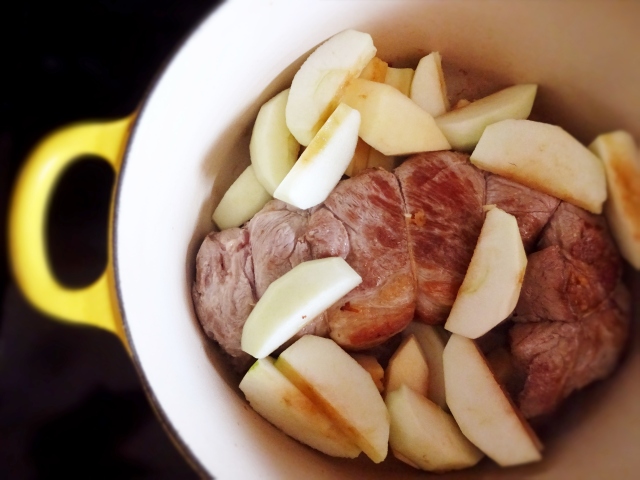
add white rice and green parts of green onions on top.

Why do we put white rice?  It helps the meat get juicy and soft!

By the way, we use white rice when we cook DAIKON radish.  That is because not only rice takes harshness of daikon radish but also it whitens daikon.

Return to the pork,,,


p9

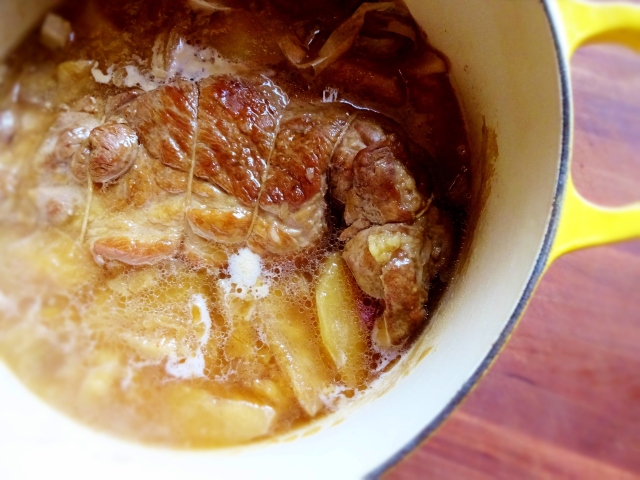
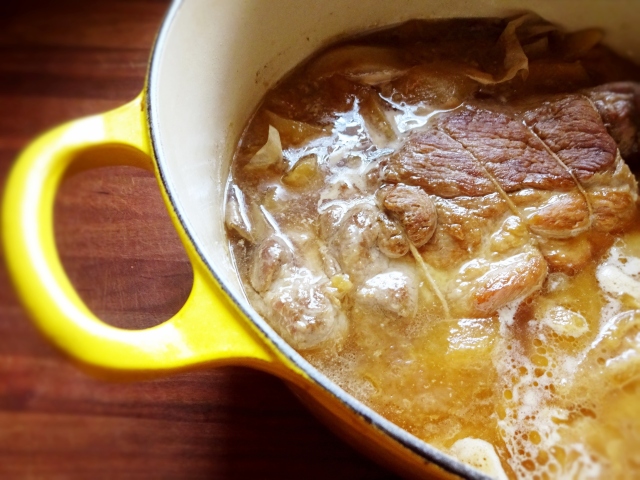
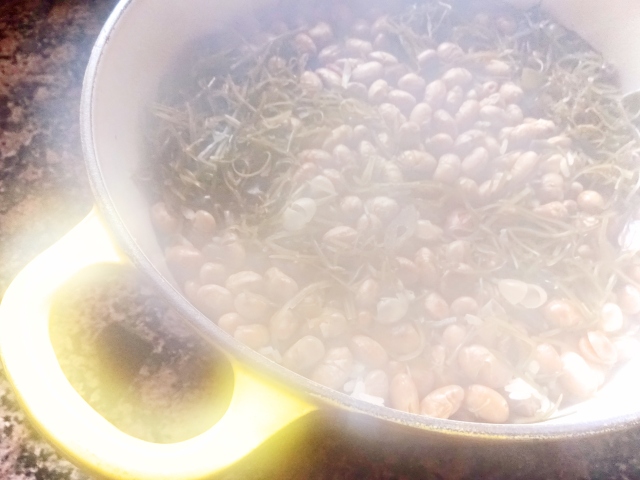
add ginger slices and enough water which covers pork, and heat until it boils.  Skim off the scum, and put the lid on and turn the heat in low.

Check sometimes for skimming off the scum, and cook for about 1 1/2 hours or until pork gets soft.

Remove from heat, and leave it until it get cold enough.

Discard the green onions and ginger.  Sieve the soup so that you could remove rice.  Then put this in the fridge.  Sadly my fridge is not big enough, so ,,,,

p10

I keep them in the container.  When you keep it in the fridge, put plastic wrap on the surface of the soup.  Because,,,,


pre14

TA DA-!

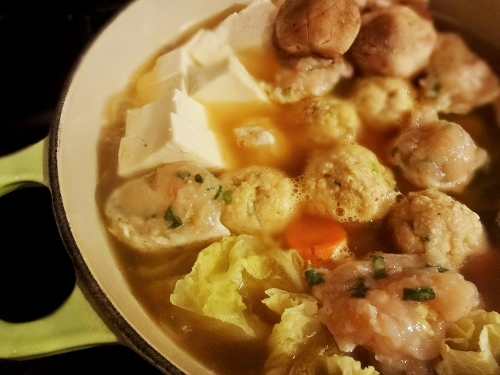
I forgot to take the moment of this exciting event, so I used the photo I took the other time (not BUTA MESHI).

Look!  I felt so good when I saw this fat!  This helps me not feel guilty that much!

You could use the leftover soup for another use, like soup for Ramen.

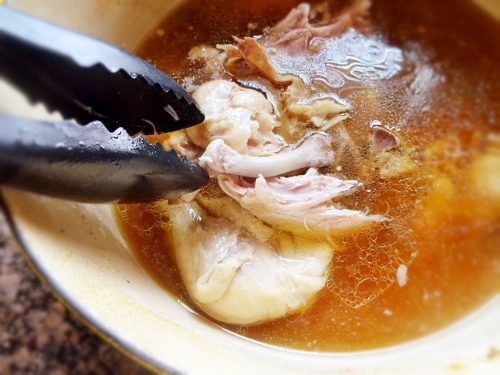
This time I only used,,


p11

MEAT!

By the way, you could keep this meat in the fridge for 3-4 days if you wrap them tightly with plastic wrap.

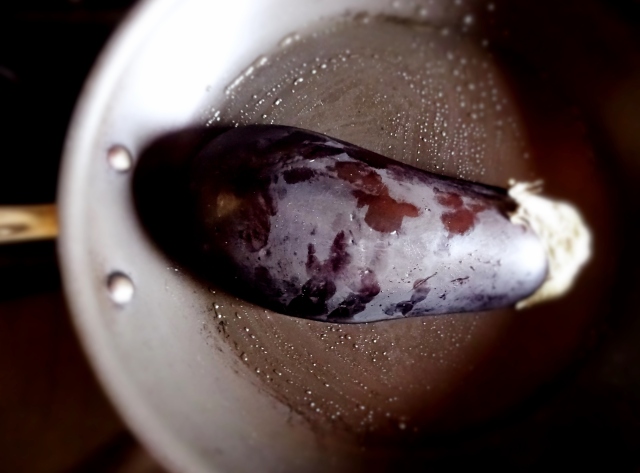
Now we make sauce.  Put brown sugar, soy sauce and mirin in a small pot, and melt the sugar.  set aside.

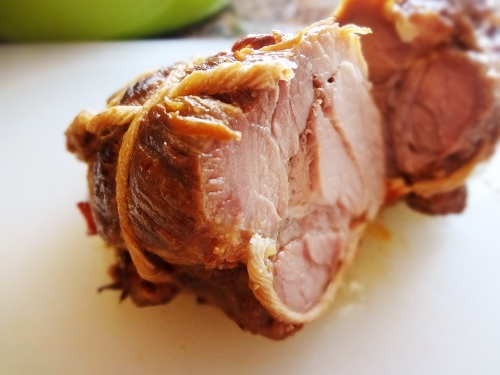
Return to the meat, cut the meat in half crosswise, and then cut it about by half-inch lengthwise.

p13

Like this.


p12

Sorry, this is a little thicker than half-inch, but my husband will be glad.

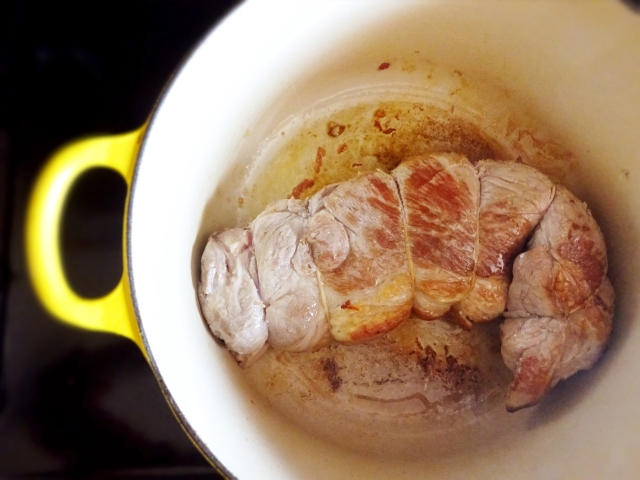
Heat a pan (preferably cast iron skillet) with no oil, and ,,,


P16

saute them until they get browned.


P17

If you see lots of oil, just wipe it with paper towel.


P19

Looks nice already.  Then,,


P20

add prepared sauce and saute a little more.  Since this sauce has lots of sweetness, be careful not to burn too much.


P21

OH MY GOD!   Looks good and smell good!

P25

Since this pork was cooked until it got fork tender, they easily fell apart.

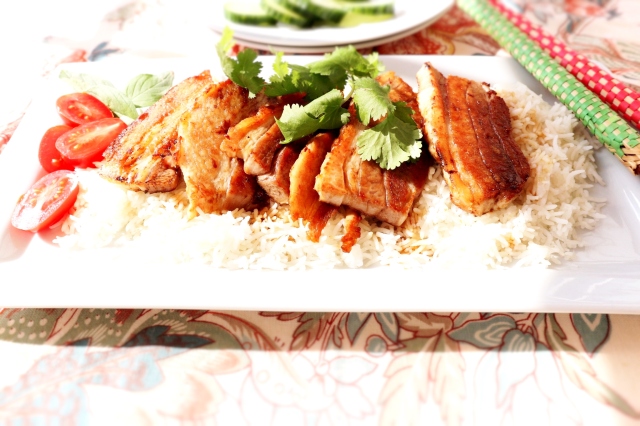
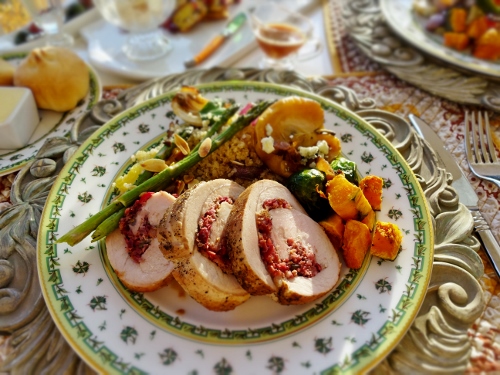
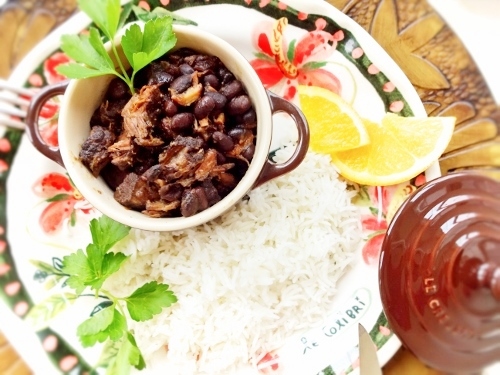
Prepare rice and put the pork on the rice carefully.

Pour extra sauce if you like.

I was about to serve this pork with Japanese rice (sweet  and sticky), but I changed my mind.  I decided to serve with Jasmine rice instead with cilantro. You could grind black pepper on top if you like.


p27

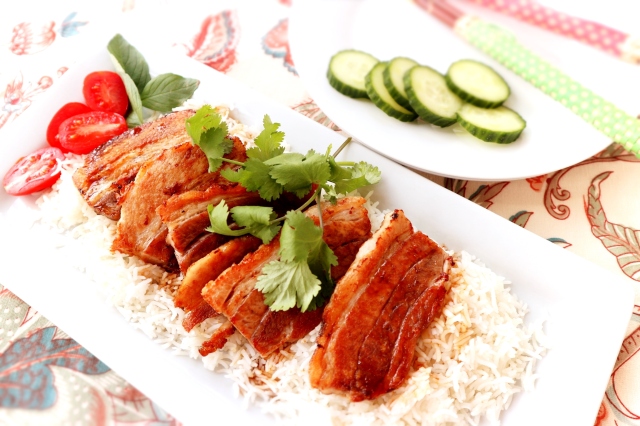
I though this was too much for one meal, but my husband finished them all!!

He said,

This is so tender.  So delicious.  Even though they are pork bellies, they are light! 

Once you prepared cooked pork, you can flavor the pork with any flavor.  You could go to Vietnamese flavor using fish sauce and red hot chili or you could go to American flavor using BBQ sauce!  You could make sandwich with them, too!

I hope you enjoy them!


How to plate Japanese food

p30

This pork dish was really a hit.  I cooked two hours, and then I sautéed them with sweet sauce.  My husband loved it.  However something is wrong in this photo above.  Can you see it?

A few days ago I got e-mail from my Japanese male friend.  He was saying that he couldn’t stand seeing that photo.  He said,

Did you forget Japanese spirits?  Do you really like cooking?  You love cooking, but don’t mind a proper plating?

I could feel how upset he was.   We are good friends from university, so he didn’t mean he offended me.  He always teaches me things I don’t know.  I like it.

I was thinking for a while, looking at this photo.  He was mentioning something about plates.  He said it was opposite.  The plate is white, so there is no pattern or a figure.  How could it be opposite then?


p27

He meant I put pork opposite.


SUSひ

taken at one of Japanese restaurants I have been 

As you can see in the photo above , we should put any slices (fish or meat or anything!) as HIDARI OMOTE, left side up to pick up easily with chopsticks (for right-handed).  We also traditionally believe HIDARI (left) is good.


5_23_48552s-3

borrowed from MARUKOME.co.jp

For example, we plate a whole fish a head left. Especially for a festive occasion, we definitely have to put head left.

That is why my plating was wrong.  More over I could put garnish at wrong corner.  As for garnish, I had to put it on the right corner.

Japanese food is famous for beautiful plating, and it has a rule like cutlery setting in French.

For example, miso soup and rice should be set in front of the dishes, miso soup at the right and rice at the left.  This is very basic.


HIJIKI10

Also we should plate foods by  odd numbers.   We think odds numbers are good (Yang-as in Yin/Yang).

Each food culture is so unique.  What is thought to be good for one culture can be unacceptable in other culture.  Think about slurping Ramen!


k4

There are still tons of rules for Japanese food, and I will write about them sometimes in future posts.

By the way the pork in the first photo and the photo above are so good, so I will write about them next!

I was so glad that I put pork and snap peas in odd numbers……

Good job, me!

Eternal Theme-how to cook easy-peeling eggs

001-7

I often use a boiled egg for my husband’s OBENTO unintentionally.  When I have still some space in the box and don’t have anything I could put,  I reach  a carton box of eggs in the fridge and take one egg and boil it.  Last resort.

How to cook eggs perfectly for easy-peeling is often being asked in cooking magazines, and , like many people, I have tried various ways, seeking the BEST way.

Here is my way.   I put eggs in a pot with water, and start boiling it.  After it boils fully, I turn off the heat and put a lid on.  Wait 8-10 minutes.  Then save eggs from the water and put them in the cold water.   This is the way I decided to do ten years ago.

When I went back to Japan last year, I found an interesting tool in the grocery store.


002

The product name is TSU RU RI N, which is the sound we use when something is slippery or smooth.  For example, you could use it  for the slippery floor or  you could use it for beautiful smooth skin. Oh, that makes me remind that we express a beautiful skin as egg-like-skin!  Do you have the same expression here?

Returning to the topic, how to peel eggs perfect is still my forever theme, even though I have my  way.  So I purchased this product.


20160730215344e5e

This is a simple tool.  It has a hidden sting underneath.  I put an egg on this product and push it under.


20160730215344aee

Then the sting makes a tiny hole on the egg-shell.  That tiny hole helps making space between shell and inner membrane.  If you are interested in this product, go and get  it in Japan.  Kidding.  You don’t need to go to Japan.  Just simply use a pin.


20160730215351136

It works well, but sometimes it fails. Very close, but Still not perfect for me.

Then I decided to do a new method.  I am not going to boil eggs this time.  I will steam them!


e1

I used to cook white rice in Le Creuset, but recently I got a new pot, DONABE.   Donabe is a story type of clay cookware from Japan.  This pot has a long history, but recently people rediscover its wonderful utility.  One  day  my lovely friends gave me  a recipe book of Donabe witten by Naoko Takei Moore and Kyle Connaughton.  That book fascinated me a lot!  I just enjoyed seeing all the beautiful photos and interesting recipes!  I thought Donabe is only for a hot-pot, but NOT!  As soon as I found out various usage of  Donabe, I asked my husband to get one for me.  Since he could get benefits from that, he gladly ordered it for me!  Now I switched from Le Cruiset to DONABE for rice cooking.


e2

This pot has an inner lid for keeping contents from boiling over and providing extra heat retention.    On the inner lid, we could put eggs just taken from fridge.


e3

Make sure not cover the holes of the lid.  Then just cook rice.  As rice is being cooked, eggs are also being cooked.


e4

Smell so good!

It cooks rice always perfect!

How about the EGGS?

I thought they might have some cracks on the shell, but they didn’t.  Right after steaming time for the rice, I saved the eggs and put them in  cold water.  After a while, I peeled them.

TSU RU RI N!!!!

This is the best TSU RU RI N!

The egg was hard-boiled(hard-steamed?), but it was so easy to peel.  This can end my challenge to seek the best way to cook eggs.


Then a few days later,,,,


lunch2-1

Oops,,,I did it again.

I reached the carton box again.  However I didn’t put an egg in the water.  I put the egg on the inner lid.

My husband must enjoy this perfect steamed-egg.


Japanese style Braised Pork with Apples

%ef%bc%91%ef%bc%93

There are tons of things I’ve learned since I came here in the US.  First of all,

English, of course!!   

I am still working on it, but I don’t see any progress sadly.  I would like to say once again here that I am sorry if I use wrong words or expressions in my blog.  Besides of language, I’ve been  learning American culture.  When I used to live in Japan 15 years ago, we celebrated Christmas as well (not the same way as here though), but we didn’t have Halloween nor Easter, so they looked so new and fun for me.  Now even in Japan they do celebrate Halloween and Easter.

20151130032600041

One Thanksgiving dinner at my home

I didn’t know Thanksgiving 15 years ago.   I still remember we went out for lunch on that special day and every restaurant was closed but Korean BBQ place, so we ended up with eating Kimuchi and BBQ.  Later I knew Thanksgiving means TURKEY and CRANBERRY.  Yes, cranberry.

In Japan we have many kinds of fruits, but we don’t have a culture to use those often for cooking.  When I first experienced turkey with cranberry sauce, to be honest, I thought

NO WAY!

However now I can’t eat turkey without cranberry sauce.  I am so American!


2017012102343262f

Brazilian feijyoada with oranges

Thanks to American culture, I learned that cooking with fruits enhances flavor of meals, and often it plays a big role as a tenderizer for  meat.  Now I love using fruits for our dinner.  Especially apples and oranges.

Now I know pork  goes well especially with apples.  I often braise pork with apples.  Well then, I have to take advantage my situation of my knowing two cooking cultures.  I have to apply that for Japanese dish!

Today I would like to introduce a very easy but delicious pork dish.

Here is the ingredients for today’s dish!

  • 2-3 lbs pork butt
  • 2 apples (preferably organic and sweeter variety such as fuji)
  • about 5 Tbs of soy sauce 
  • 2 Tbs of sugar   (I use brown sugar.)
  • about 1 cup sake
  • 2-3 dashi packs
  • oil

Yes, as you can see, ingredients are very simple.  Among those, the important ingredient as pork is dashi packs. They make this dish Japanese.  I bet some of you don’t know what dashi pack is.

First of all, dashi is a Japanese  stock we take from bonito, dried sardine, or kombu.  It has Umami flavor.

These days we have a convenient package which contains those UMAMI  flakes in a bag.   You can just put this in water and use it.  There are many dashi-pack brands, but my favorite brand is KAYANOYA.  Recently  I found out we could buy this package here in the US!    Here is their online site!   If you have a chance to order it, please make miso-soup with this package at first!  I think you could enjoy better miso-soup than in some Japanese restaurants.  I highly recommend this products.

Now I have this packages in my hand, so why not using them for good UMAMI flavor?  Actually this recipe was introduced in their Japanese site.

I have never thought using apples for typical Japanese foods, so when I saw this recipe, it was an eye-opener.

OK! let’s try it!

If you have organic apples, just core them and leave their skins on.  Cut into 8 slices.  I didn’t  have organic apples in my hand sadly, I peeled them.

%ef%bc%94

Tie the pork with string for keeping its shape.


%ef%bc%95

Heat the oil in the pan and brown it all sides.


%ef%bc%96

Put the apples and,,,,


%ef%bc%97

2 dashi packs, 2 cups of water, sake, soy sauce, and sugar in the pan.  If you like strong flavor, you could increase the amount of soy sauce here.


%ef%bc%91%ef%bc%90

Once it boils, turn the heat  low.   If you think you need more liquid to cover the pork, go ahead adding water.


%ef%bc%91%ef%bc%91

Put the lid on and cook at least for one hour until the pork gets tender.  I think I cooked for about 1 and half hour.


%ef%bc%91%ef%bc%92

That’s it!  How simple is that!

Japanese food tends to be sweet, so if you use sweeter apples, it becomes more like Japanese.  Since I use Granny Smith, mine has a sour taste, which was also good, though.

In this dish, apple flavor didn’t overwhelm  and merged really well with other ingredients.  If you leave the skin on, apples keep their shape better, so you can also enjoy them as well as pork.


022

Pork gets tender because of slow cook and enzymes of apples.


s-dsc03240_20140224030820fbc

You can put boiled eggs at the end and cool them in the soup for a few days.  Those eggs are also so good!


1

This pork is very versatile, so you can put it on Ramen as well!

Again I have to take advantage more of my situation.  I know two wonderful cultures, so I need to make fusion more!

By the way, I heard that they  have Black Friday in Japan even though they don’t have Thanksgiving,,,,,

Interesting fusion culture,,,,.


The Easiest Eggplant Dish Ever!


%ef%bc%99

I came to the US 15 years ago, and it was my first experience to live in a foreign country.  Sorry to say this, but I thought people in the US only had hamburgers, pizza, and hot dogs.  When I saw people eating SUSHI rolls with chopsticks, I was so surprised and impressed.  Now we have more varieties of international foods here and we can find any ethnic vegetables or condiments in most of grocery stores.  By the way I thought  familiar vegetables for me such as green onions, ginger, and okra all belonged to Japan.  It was several years later I found out okra is originated in Africa!  Eggplant is one of vegetables which I though is JAPANESE.

%ef%bc%92%ef%bc%92

People here make Eggplant parmesan and baba ganoush and more.  In Japan as well there are many eggplant dishes.  We often saute or steam them.  We pickle them.  Eggplant doesn’t  have strong flavor, that is why they are very versatile, I think.

One of my favorite ways to cook them is a saute/steam method.  After burning it on the pan, put a lid on and steam it.  It is so easy and you could put anything adds-on  depending on your favor.

Now I would like to introduce how to do that even though there are not so many processes.

Here are the ingredients example.

  • 1 eggplant halved
  • vegetable oil
  • daikon radish, finely grated
  • UMEBOSHI ( more about UMEBOSHI is here!)
  • green onion, chopped
  • lime
  • bonito flakes
  • soba tsuyu (dipping sauce for soba noodle)

Then let’s cook!

1.Wash eggplant well, and using paring knife (I used a knife for grapefruit! This works so well!), run it along the inside of the skin. (not cut through!).  Then make a square-cut inside the line.

03-3

2.Heat the pan and add vegetable oil.  Put a half of the eggplant cut side down (if you make two of them at once, you could put two together.)  Saute in medium heat for about 3- 4 minutes until it gets burned-markings.

03-4

3.Flip it and put a lid on and keep cooking for about 7-8 minutes. (This is a steeming process. Since eggplant has lots of water in it, you don’t need to add liquid here.)

THAT’S IT!

You get soft juicy, but not too mushy eggplant.  Now you could put anything on it.

%ef%bc%91%ef%bc%97

I put grated daikon radish, bonito flakes, green onion, along with a huge UMEBOSHI, a pickled plum.  Then I poured soba tsuyu on top.

I know it is a bit hard to find bonito flakes, Umeboshi and soba tsuyu, so you could just use grated daikon radish and soy sauce!  You may want to have citrus flavor, so use lime or lemon.

011-1

This is so good.  My husband loves this.  He doesn’t know how easy it is to make this dish!

That is the best part!

Enjoy!


versatile TSUKUNE (chicken patty) base 

8

When I showed this picture to my friend, she said ” it will never happen to me“.

This is OBENTO for my husband.   I have been living in the US for more than 15 years now, and I know lunch styles are different for each country.  For us Japanese, as well as breakfast, lunch is also important, and we have a wonderful OBENTO culture.

Recently the word OBENTO ,or lunch box is often appearing in food magazines, and they suggest healthy and delicious lunch box menus.

My friend who was very surprised to see my OBENTO for my husband told me she could do PB & J, but she wouldn’t wake up early in the morning and prepare that kind of OBENTO.

I know sometimes it is hard to wake up early, but OBENTO culture is in my DNA! This is THE LUNCH for me. This is THE LUNCH mothers and wives would like to prepare for someone they love.  We have a special word for OBENTO made by wives.  That is AISAI BENTO, literally means BENTO made by wives with love.

Today I would like to  introduce one of the nice items not only for dinner but also for AISAI BENTO!

obento1

That is TSUKUNE , chicken patty.

If you have been to Japan, you many know what TUSKUNE is.

Tsukune is made of grounded chicken and ,in some cases , vegetables such as green onion.

20150321090658a3d

(they are yakitori)

Wikipedia says tsukune is a Japanese chicken meatball most often cooked yakitori style.

The last two in the photo were tsukune.

My tsukune base is very versatile.  Once you make the base, you could make meatball with sauce, or put that in the hot-pot, or like I did, fill them into vegetables and pan fry them.

Besides, they freeze very well, so you can stock them in the freezer!  How nice!

Even my friend could prepare OBENTO then!

I sometimes make grounded chicken at home using standing mixer attachment, but you could use store-bought grounded chicken or turkey.

Depending your favor, you could use chicken breast or thigh.  When I ground at home, I put green onions and ginger at the same time, that way they distribute well into the meat.

s-DSC09689

You may be able to use a food processor.  I used to do that.  Just chop meat by cube, and put all the ingredients you want.  Be careful not to run the machine too much.  We don’t want paste here.  We need some meat texture left.

Either home-made or store-bought, now  you have grounded poultry in your hand.  Then I will show one example of tsukune base.

Here are the ingredients example.

3

  • 1 pound of ground poultry
  • 2-3 tablespoons of green onions, finely chopped
  • 2-3 teaspoons of grounded ginger or only liquid
  • 2 teaspoons of shiokoji (if you have)
  • 2 teaspoons of grounded sesame (optional)
  • some wild mushrooms, finely chopped (optional)
  • 1/2 medium size cooked carrot, finely chopped (optional)
  • 1/2 large size egg, beaten
  • 2 teaspoons of potato starch (or any other starch)
  • 2 teaspoons of sake

2

Remember, you can use any vegetable as far as you chop them fine, and they are easy to be heated through. ( if not, cook them beforehand.)

Egg is kind of MUST ingredient for tsukune to have soft texture, but you can adjust other condiments.  For example, when I bake tsukune with sauce, I don’t put any salt.

1

When I prepare, I make two kinds of tsukune base.  One has lots of enoki mushrooms, which give tsukune crisp texture.  I use this for chicken patty for my husband’s obento.


19 (600x450)

I shaped them and put sesame on both sides and sautéed them with shoyu based sweet sauce.


20160528011725058

The other  base in the bowl was for hot-pot.  I put lots of vegetables along with those tsukune ball, so I didn’t put any vegetable other than green onions and ginger.


5

For this obento, I put tsukune base inside baby bell peppers.


4

Half the peppers and fill tuskune base inside the peppers covered with potato starch.  Then pan-fried them, first meat side down, and then flip them and cover the pan with lid and heat them through.You can eat them with soy sauce and some citrus if you want.


9

Would you like to make this kind of OBENTO for someone you love?

Set the alarm at 5!

I heard someone says NO WAY!!


Best Chicken Soup Ever!

1

Organic whole chicken was on sale!

I had to pick it up even though I didn’t have any  plan to use it.

By the way, if you get a whole chicken, what would you like to cook?

Of course, roast chicken is the first thing everybody comes up.

In Japan, roaste  chicken is a special occasion meal, but not here.

We here have relatively many chances to have roast chicken since many restaurants have it in their menu, and also most of grocery stores sell them.

So, that is not exciting option for me.

Then what is it?

CHICKEN SOUP!

Is chicken soup exciting?

YES!

Chicken soup is also ubiquitous and not special occasion food, but I think the best chicken soup is made at home, not at restaurants or any grocery store’s pre-cooked section.  That’ why it could be very special!

OK!  I will make a very special chicken soup today, but in Asian way!


2

What a nice smell!

I made this in the oven, roasting slowly.


4

So delicious with tons of Umami flavor!

Besides, don’t you think this looks  elegant?

It is easy to prepare if you have time for the usage of oven.

So, let’s begin!


Here are the ingredients for this soup.

  • 1 whole chicken (3-4 lb)
  • salt (1% of the weight of the chicken)
  • 5-6 dry shiitake mushrooms (Soak them in the water overnight.  Don’t throw away the water. We will use for the soup.)
  • 1 -2 green onion
  • 3 inches of kombu
  • 1 cup of shaoxing rice wine ( if you couldn’t find one, replace with sake)
  • 1 Tb spoon of soy sauce
  • 1 Tb spoon of fish sauce
  • celery leaves
  • 2 star anise
  • cilantro

20160317052153d9f

First rub the chicken with salt (1% of its weight) and ground white pepper.

Leave it in the fridge at least one hour, but no more than 4 hours.


201603170522346e6

Squeeze the liquid from shiitake mushroom and take the axis of hydrated shiitake mushroom and set aside.


Cut the green onions by  2 inches lengthwise (I used green parts only), and set aside.

Set the oven at 350 F.


Cut off the stems of cilantro and tie them with twine.  We will use the leaves for garnishing.

Likewise cut the leaves of celery and tie them.


The spice we use today  is star anise.  They have strong flavor and play an important role for this soup, so if you don’t have them in your pantry, run to a store!


20160317052301c14

In the large dutch oven pot, put the chicken (if you don’t like saltiness, wash it with running water quick and wipe it with paper towel).

Then put the shiitake mushrooms, kombu, green onions, celery leaves, and cilantro stems.

Pour total 8 cup of water, including the shiitake water, and then,


20160317052323f6e

add soy sauce, fish sauce and the star anise.

201603170523259ff

Bring  the pot to a boil .

Take off the scum, and put the pot in the preheated oven with lid.

Cook about one hour and half to two hours, depending the size of the chicken.

That’s it!!

I think mine is ready after 2 hours.


20160317052349815


Good smell!

Take the leaves of celery and stems of cilantro.

201603170523516d0

Don’t you think it looks delicious?

I want to this soup very clear, so I strained the soup to take the residue of the vegetables.


201603170525370ce

The meat fell off easily.  So tender and juicy!


3

This is such an easy cooking and delicious meal!

You could put some noodle in there like Ramen.

5

Enjoy the soup! 

Next time you  cook CHICKEN SOUP, remember there is another type of flavorful chicken soup!

20160317052151ebb

I start waiting for the next chance already!


Daizu Gohan ( roasted soy bean rice)


6

Setsubun , a throwing beans event, is gone.  We use soy beans for that, so my mom sent me soy beans far away from Japan.

I know we could get them here as well, but the  quality is different.

How could I throw these beautiful soy beans outside even though it was for the luck?

Besides they are purified by the prayer of the shrine.  That is why I pretended throwing them, and saved them for cooking.

Every year after this event, I look forward to making roasted soy bean rice with this intentionally left over soy bean.

This is not a fancy food at all and a  kind of a comfort food for me, so we needed it to rest our stomachs.

Yes, after Setsubun ,,,

47

we enjoyed fried chicken for super bowl!

It was my first time to make American style fried chicken, but it was a fun!


100

I don’t know the best way, but I brined them in the buttermilk mixture, and then steamed with a lid during frying.  It was a little scary, but successful.  You could imagine how much my husband enjoyed them.

So we needed some kind of gentle food like this not-fancy but delicious comfort rice.

Some of you may not like this rice because it has lots of UMAMI flavor including sardines, but this is definitely a strike for us Japanese.

Here are the ingredients for today’s dish.

  • 3 cup of white rice
  • 3.3 or a little more cup of water
  • soy beans
  • small dried sardines (niboshi)
  • kombu
  • shirodashi (salty umami liquid)
  • 2 teaspoons of sake


1

If you are not sure how to wash and rinse white rice, please check here.

After washing, drain for 30minutes, and then put dried sardines if you have.

The ones I used this time were small, so I didn’t need to take their guts and bone off.

100

If you use regular size dried sardines, you might want to take heads, remove the guts and bones because they are bitter. Then, split them lengthwise like the photo above.  When I opened a new package of dried sardines, I always do it at once, and store them in a canister in the fridge for the future convenience.

Ok, back to the rice.

Roast the beans in the pan until they get fragrant, and add them on the top of  the rice.  Then add kombu.  I had shredded kombu, but if you use regular one, just cut 2-3inch, and put it on the rice.  After cooking, you can julienne it and return to the rice.

Then add water and sake.

I had enough umami flavor already, so it would help the rice t0 be flavorful without too much salt.  However if you want, you could add 2 teaspoons of shirodashi (if you want) or salt or soy sauce.

Then cook rice like we do for the regular white rice.

I waited enough for the rice to get steamed, so I think it is ready!


5

Nice aroma!


6

Fluff the rice, and that’s it!

I put this rice in my husband’s obento.

36


I hope he liked it!

This is the comfort food for us…..

Oh, by the way,  could you see the meat ball behind the rice in the lunch box?

I will talk about it next time!


Final Episode of EHOMAKI!

s-DSC00852

Happy Valentine’s Day, everyone!

I know this coming Sunday is  St.Valentine’s Day, and I should write about chocolates,cookies, and bonbons, but we are still in,,,,,,


57 (600x450)

SETSUBUN!

If you come to my blog for the first time, please check the last two articles.

102

Yes, we are preparing those things for this final episode of EHOMAKI!

Finally we ROLL IT !

OK, let’s roll them!

So sorry to say this,   BUT we still have one more very important thing we need to prepare.

WE NEED RICE!

I already write how to cook white rice here,  but there are some different procedures, so I will show that again.

24 (600x450)

Here I have 3 cups of rice, washed and rinsed well like we did for white rice.  Then drain them and leave them in a colander for 30 minutes.

25 (600x450)

Differently from just white rice, I have KOMBU here.  You may notice that , I have two balls which I put every time I cook whatever rice.  They are potteries and they distribute the heat well. Of course you don’t need to have them.

26 (600x450)

Kombu has white stuff on the surface, but you don’t need to worry.  This is not mold. This is mannitol, which is one of  umami, a sweet agent in kombu, so please don’t wipe it off.  Just rub gently to take dirt ( if it has) with paper towel, and it is ready to go.

Place two pottery balls in the rice, and pour water.  This rice will have vinegar later, so we need to cook somewhat a little dry.  Here I use 3 cup of rice, and we need  10% more water of rice amount.  In my case, I use a 200ml cup ,so for my rice, I need 660ml of water.

After pouring the water, put kombu in it, and  leave it for 30minutes for rice to absorb the water slowly.

Now we need to prepare sushi vinegar.

30 (600x450)

Recently many grocery stores carry sushi vinegar or seasoned rice vinegar.  It is totally fine to use it, but sometimes it may contain corn syrup, so you might want to check the ingredients.  It should be rice vinegar, salt and sugarHow simple is that?

For one cup (200ml) of  rice, we need 20-25ml of vinegar, 4-5g of sugar, and 2.5g of salt.

I use 3cups of rice, so I need 60ml-75ml of vinegar, 12-15g of sugar, and 7.5 g of salt.

Most of the stuffing of my EHOMAKI has already cooked with sugar, so this ratio is not that sweet.  If you like sweet rice, you could increase the amount of sugar.

In a small sauce pan, put them all and heat it until salt and sugar dissolve.  Please don’t boil it!  The flavor of vinegar will be gone!

While you cook rice, prepare the large bowl and a fan.

38 (600x390)

This is SUSHI OKE, a sushi rice container made of wood.  This absorbs unnecessary water, but at the same time leaves rice moist.  FANTASTIC!

My mom send this to me a while ago, and this is my first time to use.  Until then, I was using glass bowl (non reactive bowl), so it is totally fine for you to use a regular bowl, but you need a large one.


OK, rice is cooked!   Take kombu out, and fluff the rice with a large spoon lightly.  Then ,


43 (600x450)

transfer the rice to a large bowl, in my case into sushi oke.


Now you have cooked rice and sushi vinegar in front.

READY?


39 (600x444)

The reason I told you to prepare a large bowl and a FAN is because,,,,


42 (600x450)

we need to make wind while mixing rice with sushi vinegar!

WHY?

One of the reasons is because rice shines when it cools down with sugar quickly.  The other reason is that we want rice to absorb vinegar, that is why as soon as rice is cooked, we put vinegar.  However at the same time, we don’t want rice to too wet , so we need to cool and dry rice to prevent too much absorption.

Don’t you think this work needs more than one two hands?

YES!

I called my husband to make wind!  I was lucky.

When I was a kid, I was always asked to do that by my grandma.  That is a sweet memory…


40 (600x450)

You could adjust the amount of sushi vinegar.  After mixing some, taste it, and you can stop whenever you want.

Now we have sushi rice ready.

Finally we can roll!

Before roll sushi rice, please prepare 1:1 ratio of water and rice vinegar mixture for wetting hands.  Otherwise the rice stick to your hands.


44 (600x450)

We have sushi rice, vinegar and water mixture, a bamboo mat, and seaweed!

45 (600x450)

Everything is ready!


46 (600x450)

Place a sheet of seaweed (nori) on a mat, short side in front.

By the way, do you know there is two sides for nori?  The smooth side is supposed to be seen, so in this case, the rough side is up, the rice side.


Then,,


wet your hands with the vinegar mixture, and grab rice and place it on the seaweed.

300g of sushi rice would be good for one big roll.

We will put ingredients in the middle of the rice, so we need to make an indentation in the middle.  The thickest part is the front and then the back, and the middle.

Don’t put rice at the far edge of the seaweed.  Leave about 1 inch.

49 (600x450)

Now place the ingredients in the middle.  If some stuffing is shorter than the length, like egg here, adjust the length, adding some.

Like rolling cakes, rolling sushi makes me excited and also nervous.

I have to do it at once!


50 (600x450)

GO! GO! GO!

ROLL IT!  ROLL IT! ROLL IT!!

You have to roll tight, but don’t squash the rice.

Try to the end of the mat into the roll and make shape for finishing.


51 (600x450)

Finish!

52 (600x450)

You can serve as it is, but for it to be looked neat, let’s cut the edges.


55 (600x450)

Wet the paper towel with the left over the vinegar and water mixture, and apply it to the knife.


63 (600x450)

Now we can eat!

As I mentioned in the previous article, when you eat this, you have to face this year’s lucky direction.  This year South Southeast!

Ohhhhh, I wish I could show you my husband’ eating this.

I don’t know why, but he stood up and held the sushi in both hands,and finished it!

He will be healthy all year long!


56 (600x450)

Would you like to be healthy and  get luck, eating EHOMAKI?


EHOMAKI PART2 -7 ingredients-


59 (600x467)

As I mentioned in the previous article, February the 3rd is a very traditional Japanese event called SETSUBUN, and there are several things we do on that day, including throwing soy beans towards ogres.  As well as seasonal events in the US,  some Japanese events are associated with foods, and SETSUBUN is not an exception.  That makes events more exciting, don’t you think?

I have a Japanese style omelet ready, so let’s move on to other ingredients for EHOMAKI and, finish making it and eat it!

Along with TAMAGO YAKI, we need to prepare more stuffs.  It is told that we need seven kinds of ingredients in total.  To be honest with you, I didn’t know that.   At the dinner table,  my husband told me that, holding  in both hands a big sushi roll which only had six ingredients.  HA HA HA….

You could put whatever you want! 

Tuna, salmon, avocado, alfalfa, broccoli sprouts, asparagus, shrimp, and ANYTHING!

Anyway I will briefly show what I prepared besides TAMAGO YAKI.

Here are what I prepared for my sushi roll.


One of them is cooked shiitake.

I soaked dried shiitake in the water over night, and take stiff axes off, then cooked them their own liquid with soy sauce and sugar until they absorbed all the liquid.

By the way, I kept axes for that night’s miso soup!


Next I cooked carrots.

Peal them, and cut them vertically.  Then cook in dashi stock with a little sugar.

I use shirodashi again here since it has both saltiness and umami flavor, so we don’t need to make dashi from the scratch.

Cook them for about 5minutes, then drain it.  You can throw the liquid here.

Cool them completely.


Then move to the other ingredient, green beans.

To keep the green color bright, cook them for 2 minutes in the boiling water, and shock them in the cold water (the left photo).

Then cut them diagnostically, and cook them for the second time with shirodashi and sugar.

Cook them for about 2 minutes, and drain and cool them flat.

Then,,,

cucumber!

We need to cut it vertically as well.  Make sure you have enough length of the length of NORI, seaweed.

OK.  Now we have,,,


4 (2592x1944) (600x450)

TAMAGO YAKI, cooked shiitake, cooked carrots, cooked green beans, cucumber, and KANPYO (the upper left in the photo).

WAIT!  I didn’t see you preparing KANPYO and WHAT IS KANPYO?


32 (600x450)

Sorry, I cheated it.  My mom sent this prepared KANPYO from Japan!  Kanpyo is dried shavings of calabash, a type of gourds.  Dried KANPYO is long and white, and this one was already cooked with soy sauce and sugar, that’s why they are brown.

Now including KANPYO, we have 6 ingredients.  I add one more while I was rolling.  That is,,,,


OF COURSE, LOVE!!!


By the way, this article is getting longer again, and we don’t have even rice yet.

What would you do?


I would do,,,,,,

56 (600x450)

I would introduce how to prepare sushi rice and how to roll it in the next article.

I promise!

SO,,,

See you soon!